Drawing Tips & Notes
There are a few items with respect to your 2D drawings that help streamline the First Article process and longer-term production.
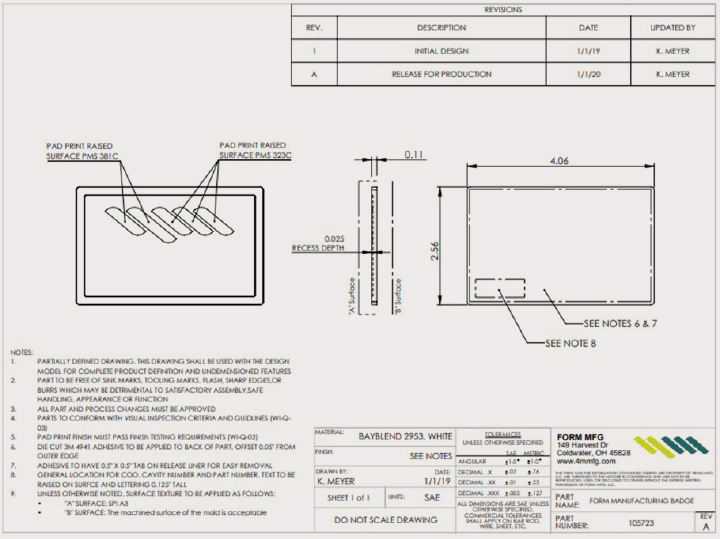
General Drawing Notes
1. PART TO BE FREE OF FLASH, SHARP EDGES, AND BURRS WHICH MAY BE DETRIMENTAL TO SATISFACTORY ASSEMBLY, SAFE HANDLING, APPEARANCE OR FUNCTION
2. PARTS TO CONFORM WITH VISUAL INSPECTION CRITERIA AND GUIDLINES (WI-Q-03)
3. ALL PART AND PROCESS CHANGES MUST BE APPROVED
Note: WI-Q-03 is our guideline for evaluating parts for appearance and aesthetics to assist with decisions to accept or reject visual blemishes and defects. Request a copy
Dimensioning Guidelines
We work with all variations of 2D drawings, but we prefer to use the Limited or Partial Data Drawing (LDD or PDD) philosophy. Due to the complex nature of some injection molded parts and surface geometries it’s not always possible or practical to dimension every aspect of a part. And with modern 3D modeling technology, we typically have a digital reference whenever we need it.
Because we measure and verify any dimensions on the drawing in our PPAP/First Article process, we like to limit the dimensioning on the 2D drawing to those that we can measure and:
1. Define any critical fit, form and function features,
or
2. Define any features that have not been specifically modeled, such as internal or external threads, text that will be applied to the tool (cavity number, part number, etc.) and gate, parting line or acceptable ejector pin locations
Recommended Drawing Note:
1. THIS DRAWING SHALL BE USED WITH THE DESIGN MODEL FOR COMPLETE PRODUCT DEFINITION AND UNDIMENSIONED FEATURES.
Tolerance Recommendations
Every manufacturing process comes with inherent variation and injection molding isn’t an exception. Processing temperatures, pressures, times, and material characteristics can all contribute to changes in nominal dimensions and part-to-part or lot-to-lot variation. The injection molding process can hold down to 0.005” (0.12mm) for many dimensions, but the geometry of the part or features plays a large role as well. If tight tolerances are important to the fit and function of a part, the design of the feature must be considered. See our Design Tips Page or Contact Us for a design review for more information or more in-depth conversation. For dimensions that cannot be controlled to a tight tolerance by the molding process a secondary process, like machining, may be necessary.
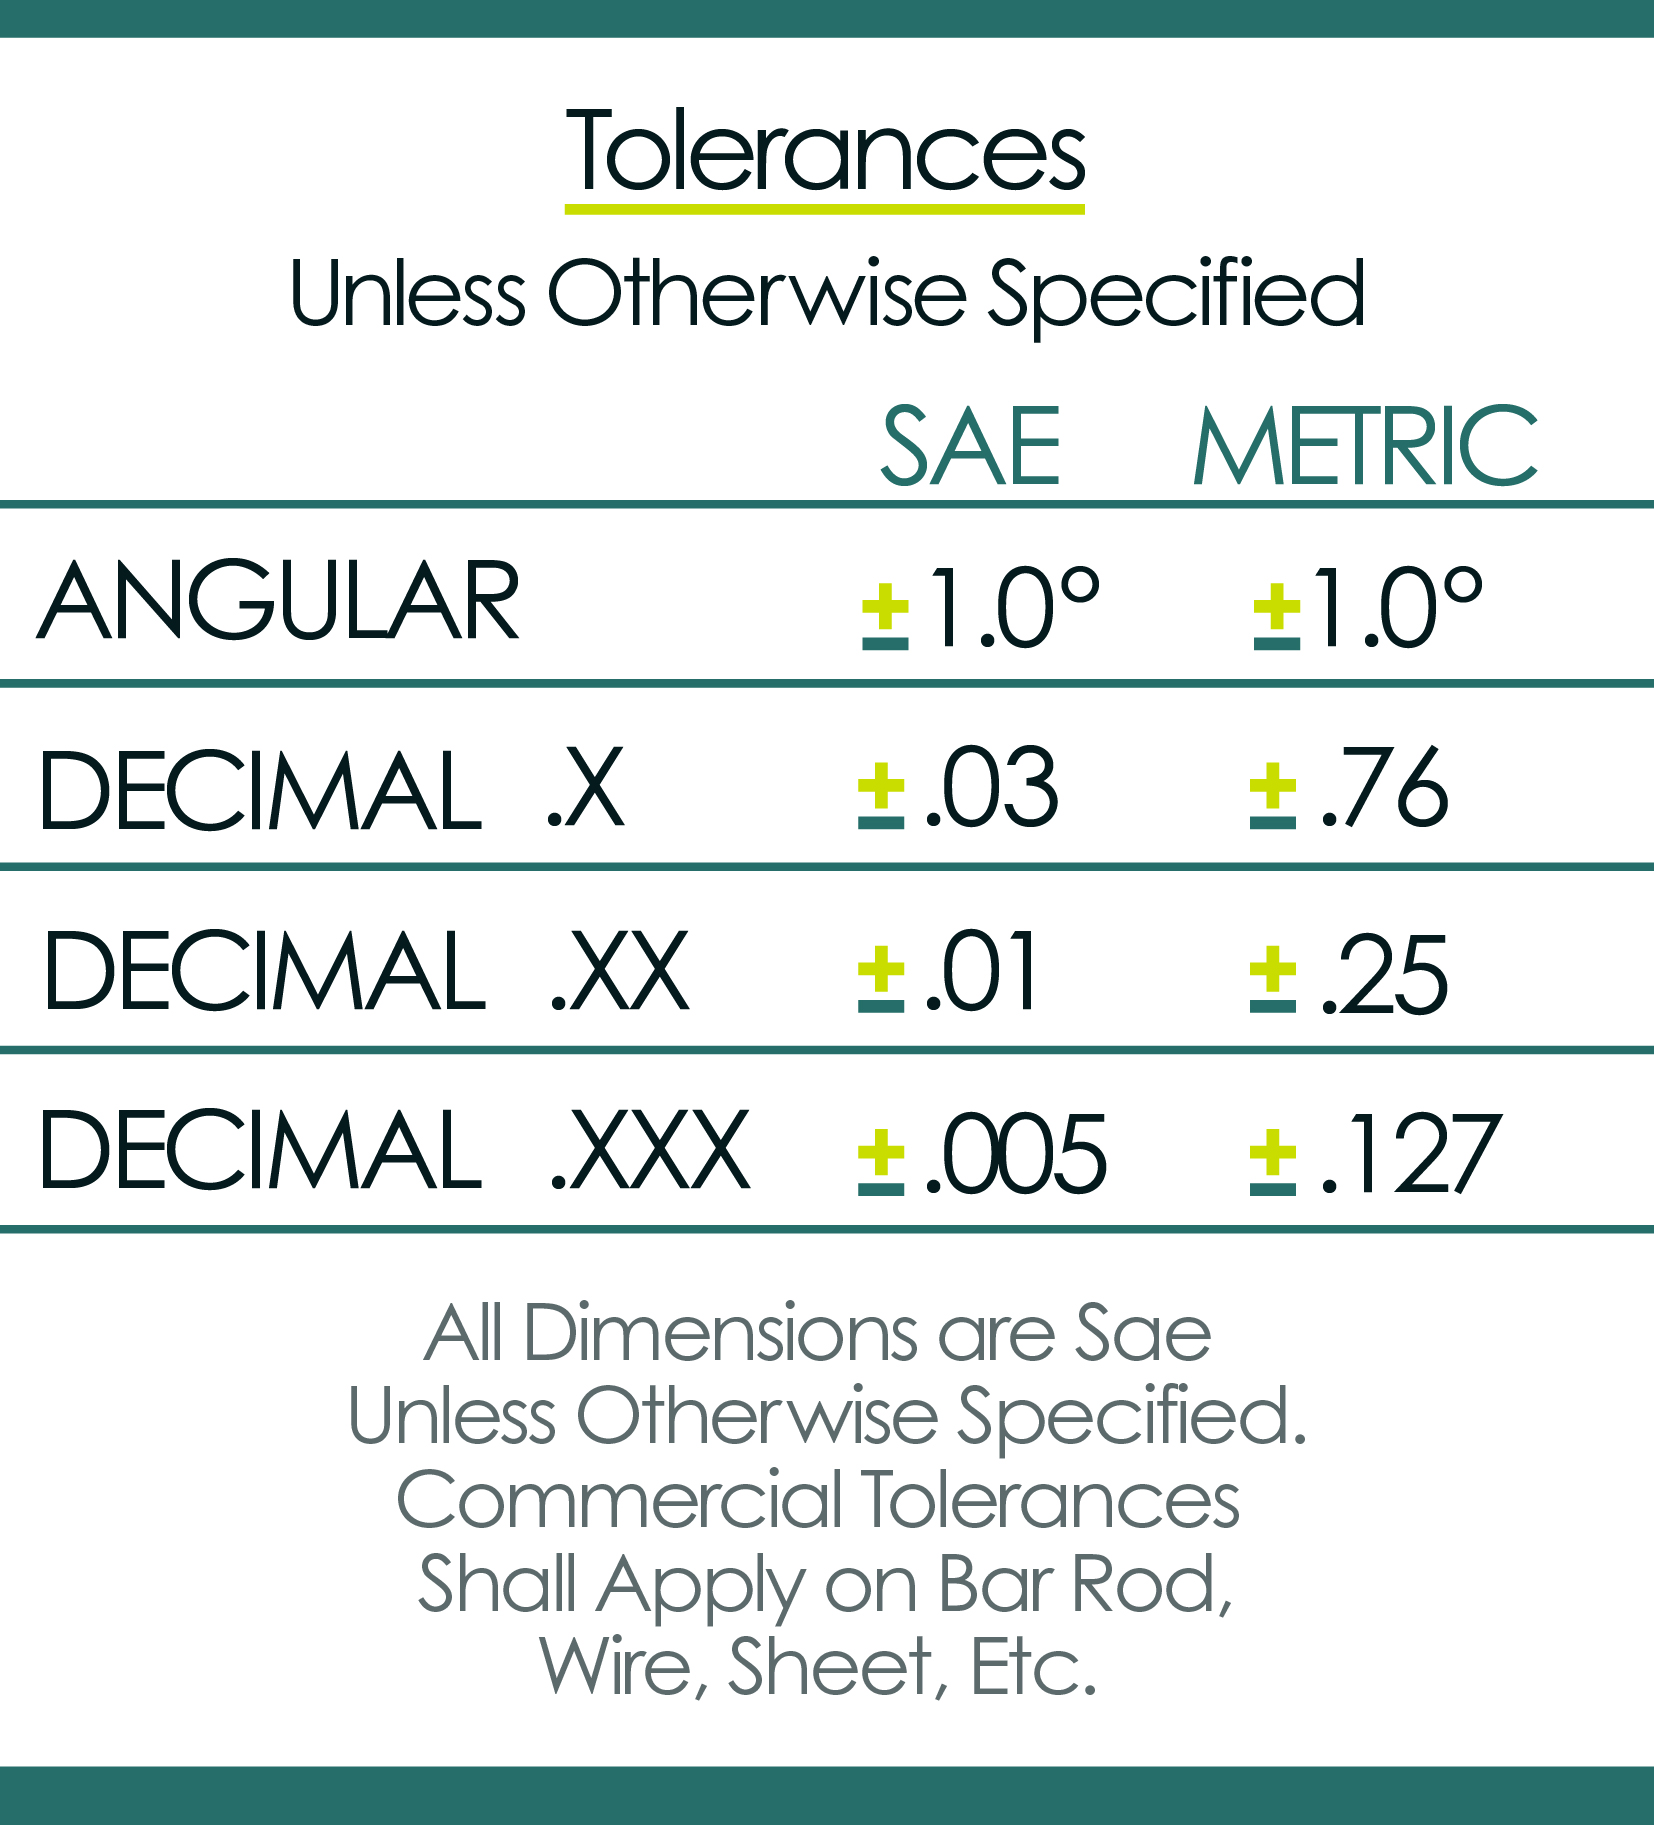
Figure 1. Tolerance Recommendations
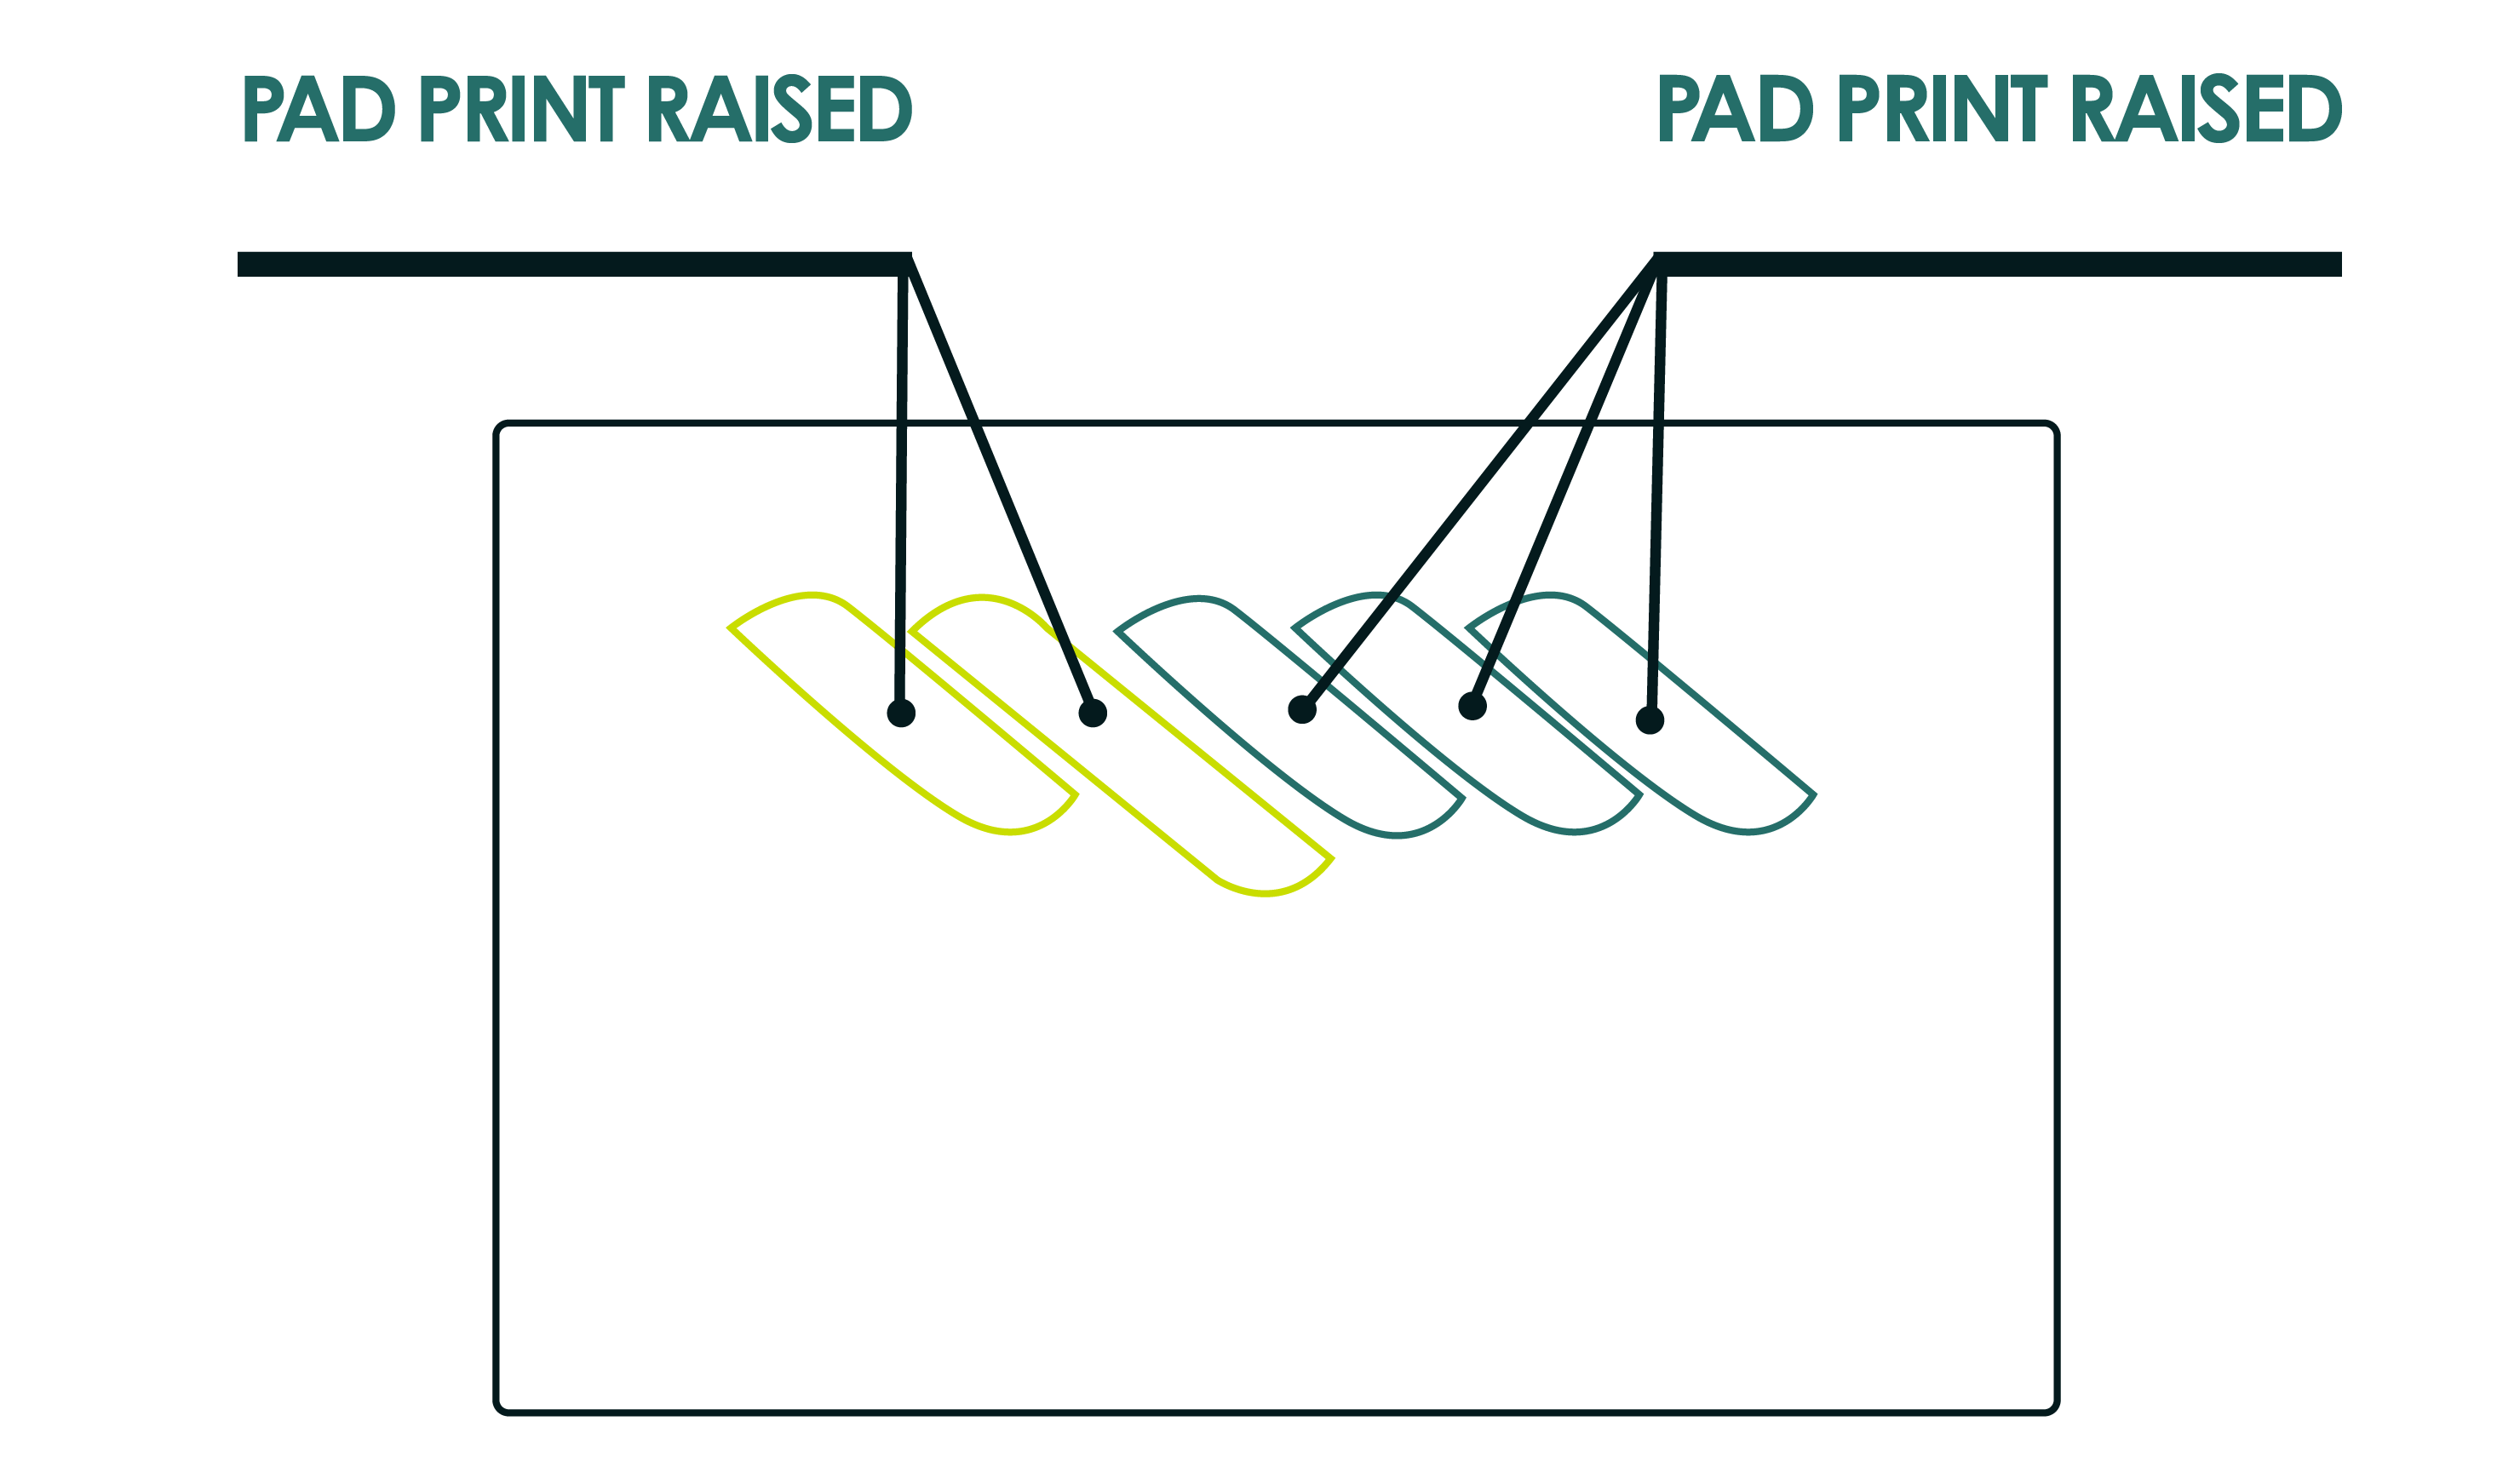
Figure 3. Example Color Call-Out
Color Definition
We can use a variety of standards for painted, printed, and molded color, but our preferred standard is Pantone and their PMS callouts. We can match RAL colors and physical samples as well. RGB and Hex colors should be converted to PMS or RAL, if possible.
Surface Texture
In most cases the desired surface texture isn’t modeled into the part and the natural machined surface of the mold isn’t desirable. In these cases, we recommend calling out the desired surface texture(s) on the drawing.
One consideration when choosing a surface texture is to understand how the mold will open and move relative to the surface. If the mold will move perpendicular with a surface, a deeper or rougher surface texture can likely be chosen. If the mold moves parallel to a part surface, a shallower texture is often a better choice. Rough textures on surfaces parallel to the movement of the mold open will likely show scrap marks in the finished part.
Surface textures we commonly use:
• MT-11010: A light sandblast texture with a satin sheen
• SPI A3: A smooth, semi-gloss surface suitable for painting,
printing and hot stamping
Example Drawing Notes:
1. UNLESS OTHERWISE NOTED, SURFACE TEXTURE TO BE APPLIED AS FOLLOWS:
– “A” SURFACE: SPI A3
– “B” SURFACE: THE MACHINED SURFACE OF THE MOLD IS ACCEPTABLE
If you’re looking to specify one texture on every or many surfaces of a part, the surfaces can be depicted as “A”, “B” or “C”. In these cases, the surface textures can be referenced and specified in the drawing notes.
A Class “A” surface is highly visible in the finished product form in the normal in-use position and more highly judged than any other surface.
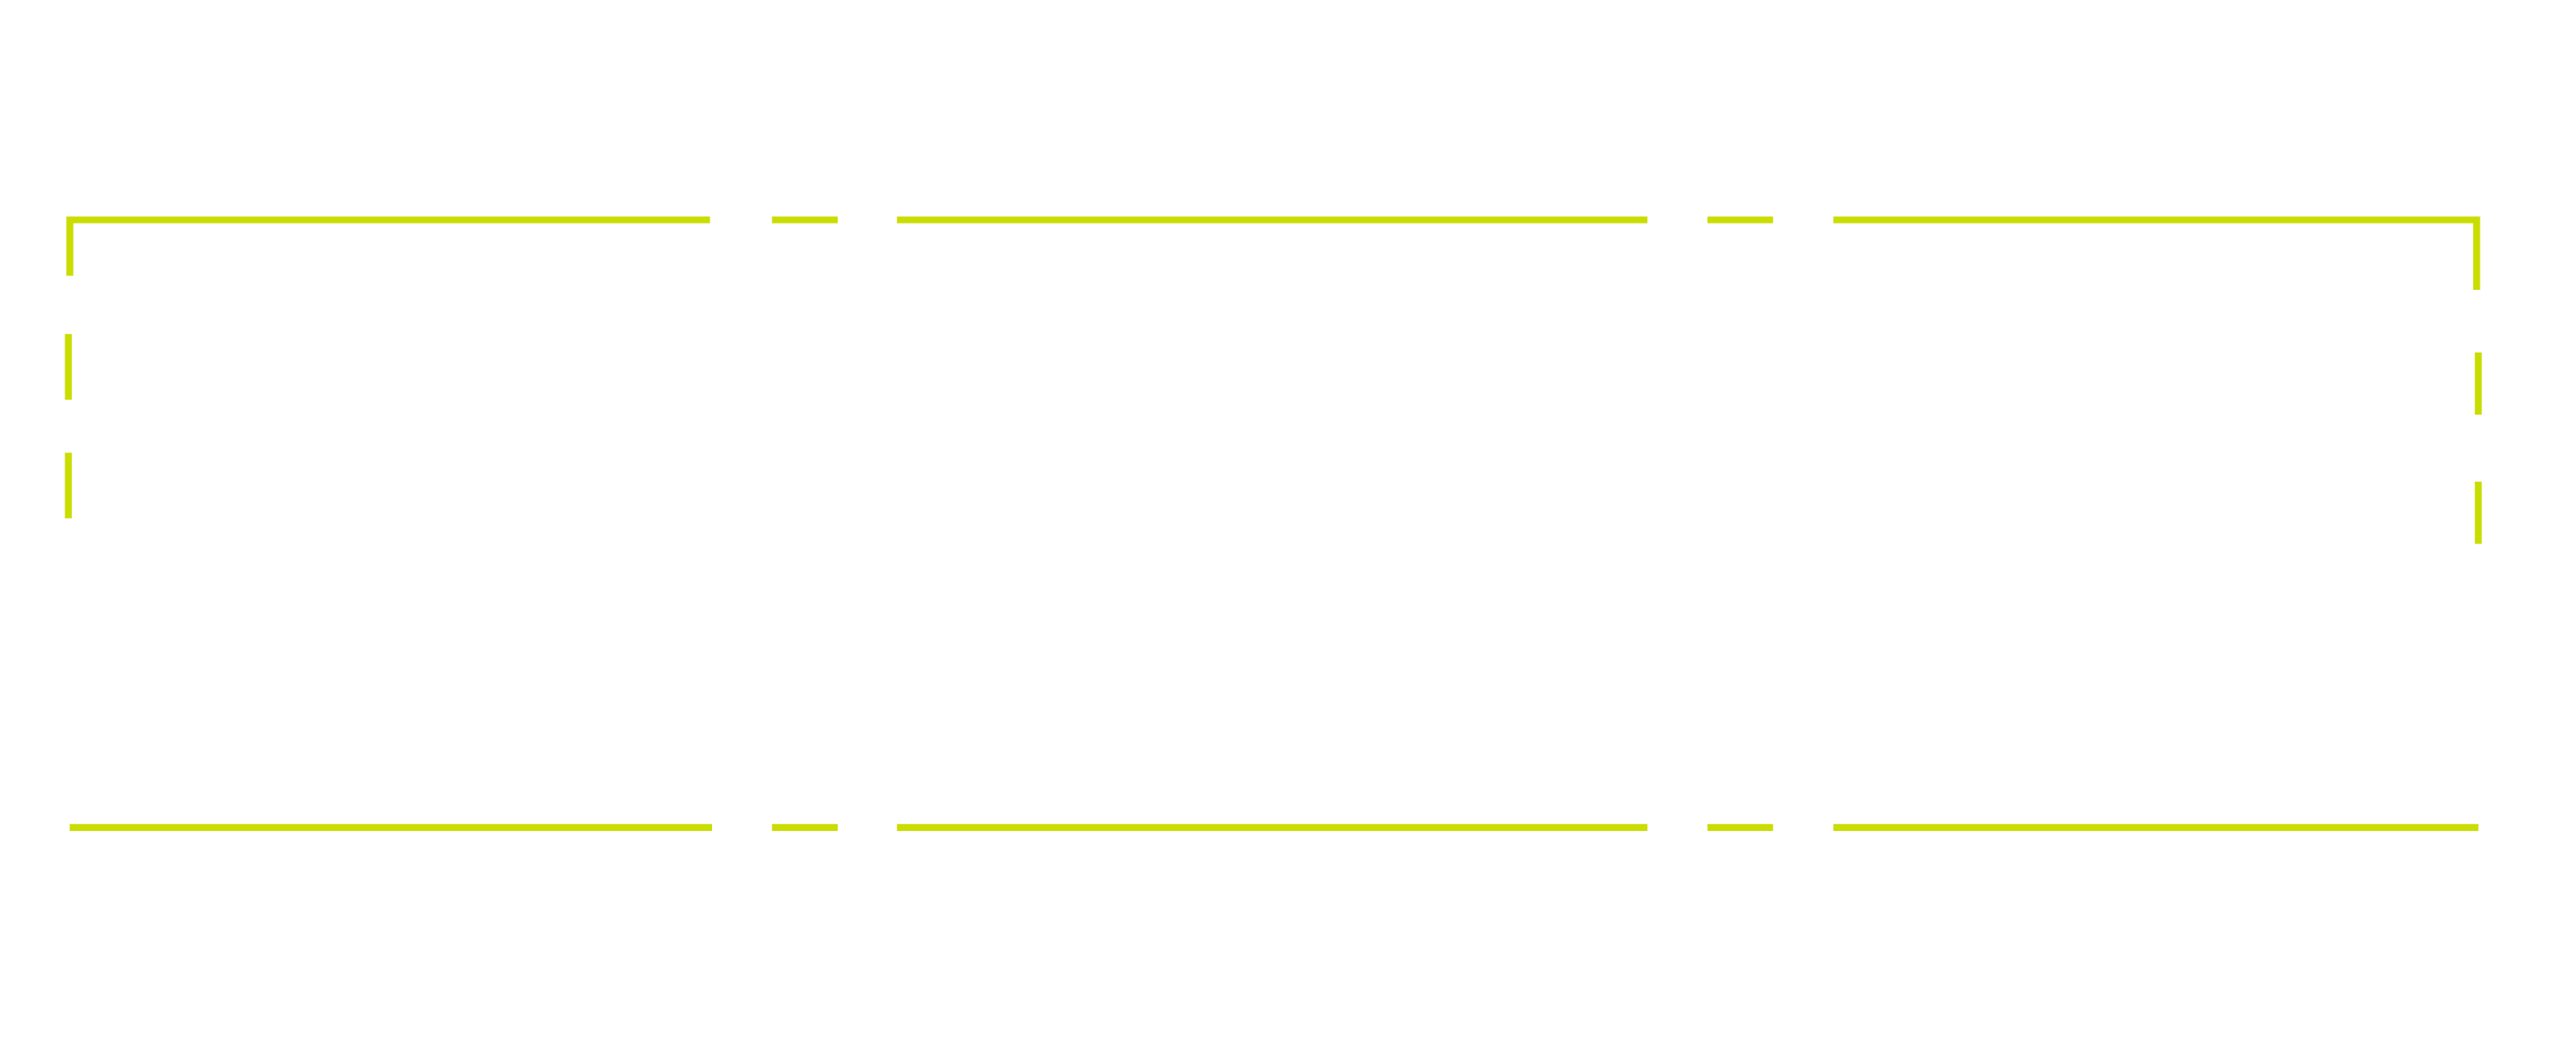
Figure 2. Example Surface Texture Call-Out
Figure 4. Example Drawing Call-Out
Part Marking
In many cases its advantageous or required to permanently mark parts by molding text or symbols into the surface. Some countries or industries require you to list the Country of Origin (COO) or a recycling symbol or text. In other cases, you want to be able to distinguish the cavity number, when the part was manufactured or be able to identify it with a part number. If you don’t want to or can’t add this to the 3D model, it may be possible to call out the information on the drawing, especially if the location or other parameters aren’t critical. Below we’ve depicted one way to include this information on a 2D drawing. Information, including text size, font and whether you want it raised or recessed into the surface can be listed
Items you may want to be molded into a part:
• Cavity Number
• Country of Origin
• Part Number (if desired)
• Date Code (if desired)
• Recycle Code (if desired)
• Material Designation (if desired)
Example Drawing Note:
8. GENERAL LOCATION FOR COO, CAVITY NUMBER AND PART NUMBER. TEXT TO BE RAISED ON SURFACE AND LETTERING TO BE 0.125″ TALL
